moultrie trail camera manual
Moultrie Trail Cameras are renowned for their reliability and innovative features, offering advanced solutions for wildlife monitoring. The Edge model, with built-in memory and flexible power options, exemplifies their commitment to excellence and user convenience in outdoor surveillance.
1.1 Overview of Moultrie Trail Camera Models
Moultrie offers a diverse range of trail camera models designed for various outdoor applications. The MCG-14048 EXO and Edge models are popular choices, featuring cellular connectivity and built-in memory. These cameras are equipped with advanced features like night vision, motion detection, and customizable settings. The Edge model, for instance, boasts flexible power options, including solar chargers, making it ideal for remote locations. Other models, such as the Delta Base, provide reliable performance with dual power panels. Each model is tailored to specific needs, whether for wildlife monitoring, security, or research. Moultrie continues to innovate, ensuring their cameras meet the demands of outdoor enthusiasts and professionals alike.
1.2 Importance of Using a Trail Camera Manual
Using a trail camera manual is essential for maximizing the functionality of your Moultrie device. Manuals provide detailed instructions for setup, customization, and troubleshooting, ensuring users can harness all features effectively. They outline diagnostic tests to verify camera functionality and guide firmware updates for optimal performance. Registering your camera through the manual process activates the warranty, offering protection and support. Additionally, manuals explain proper battery installation and SD card management, preventing common issues. Whether you’re a novice or experienced user, the manual serves as a comprehensive resource, helping you maintain and enhance your camera’s capabilities for reliable outdoor monitoring and photography.

Key Components of Moultrie Trail Cameras
Moultrie trail cameras feature essential components like the camera unit, batteries, and SD card slot. Accessories such as mounting straps and solar chargers enhance functionality and durability.
2.1 Hardware Components (Camera Unit, Batteries, SD Card Slot)
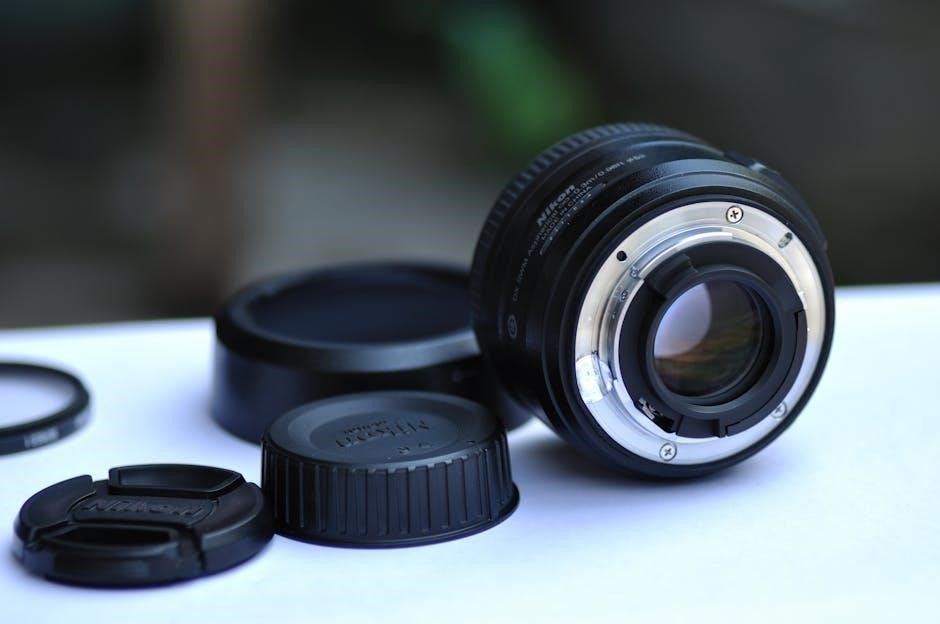
The camera unit is the core of Moultrie trail cameras, equipped with lenses and sensors for capturing high-quality images. Batteries, typically 8 AA cells, provide power, while an SD card slot supports up to 32GB storage for photos and videos. The hardware is designed for durability, ensuring reliable performance in outdoor conditions. Proper installation of batteries and SD cards is crucial for optimal functionality, as outlined in the manual. These components work together seamlessly to deliver consistent results, making Moultrie cameras a trusted choice for wildlife monitoring and surveillance.
2.2 Software and Interface Overview
Moultrie trail cameras feature intuitive software designed for seamless functionality. The interface is user-friendly, with a clear LCD display and menu navigation system. Setup mode allows customization of settings like trigger speed and image quality. Built-in memory and remote monitoring capabilities enhance functionality, while diagnostic tests ensure proper camera operation. The software supports advanced features such as time-lapse and infrared modes, making it versatile for various monitoring needs. Regular firmware updates maintain performance and security, ensuring optimal results. The interface is designed to simplify operation, making it accessible for both novice and experienced users. This robust software backbone complements the hardware, delivering reliable and high-quality results in the field.
2.3 Accessories (Mounting Straps, Power Panels, Solar Chargers)
Moultrie trail cameras come with essential accessories to enhance functionality and durability; Mounting straps provide secure installation on trees or posts, ensuring stable camera positioning. Power panels and solar chargers offer flexible power solutions, extending battery life and reducing maintenance. The 12-volt external power port allows compatibility with Moultrie’s PowerPanel accessory, ideal for long-term deployments. These accessories ensure uninterrupted operation in remote areas, making them indispensable for reliable wildlife monitoring. The combination of durable straps, extended power options, and eco-friendly solar charging creates a comprehensive system for optimal performance in various environmental conditions.

Installation and Setup
Unboxing and initial setup involve mounting the camera securely in the field using straps, inserting batteries, and installing an SD card for storage and operation.
3.1 Unboxing and Initial Setup
Unboxing your Moultrie Trail Camera reveals the camera unit, mounting strap, and quick start guide. Begin by inspecting all components for damage. For initial setup, ensure the camera is in SETUP mode, allowing you to configure basic settings like date, time, and image capture preferences. If your model includes built-in memory, no SD card is required, but external storage can be added for expanded capacity. Power the camera with 8 AA batteries, ensuring proper polarity. Familiarize yourself with the control panel, including navigation buttons and the LCD display. Before field deployment, clean the camera lens and ensure all moving parts function smoothly. This initial setup ensures optimal performance and readiness for installation.
3.2 Mounting the Camera in the Field
Mounting your Moultrie Trail Camera in the field requires careful planning to ensure optimal performance. Use the included mounting strap to secure the camera to a tree or suitable structure, typically between 3 to 4 feet off the ground. Choose a location with a clear field of view, avoiding direct sunlight, which can cause overexposure. Ensure the camera faces the target area, such as game trails or feeding zones. Tighten the strap firmly to prevent movement. For added stability, consider using optional accessories like a solar charger or external power panel. Always refer to the manual for specific mounting recommendations tailored to your camera model. Proper installation ensures reliable performance and captures high-quality images.
3.3 Inserting Batteries and SD Cards
To power your Moultrie Trail Camera, open the battery compartment and install eight AA batteries, ensuring proper polarity. For storage, insert an SD card (up to 32GB) into the designated slot. Use a high-quality card for reliable performance. The camera also supports external power options like the Moultrie Powerpanel for extended battery life. Always follow the manual’s guidelines for battery installation to avoid damage. After inserting the batteries and SD card, close the compartments securely. This setup ensures your camera is ready to capture photos and videos effectively. Proper installation of batteries and SD cards is crucial for optimal functionality and image storage. Refer to your manual for specific recommendations tailored to your model.

Camera Functionality
Moultrie Trail Cameras offer versatile capture modes, including photos, videos, and time-lapse, with customizable settings for sensitivity and trigger speed to optimize wildlife monitoring.
4.1 Capture Modes (Photos, Videos, Time-Lapse)
Moultrie Trail Cameras offer versatile capture modes to suit different monitoring needs. Photo mode captures high-quality images, ideal for detailed wildlife observation. Video mode records clips, providing extended insight into animal behavior. Time-lapse mode takes images at set intervals, useful for long-term monitoring. These modes can be customized to optimize image quality and storage efficiency. The cameras support HD video recording and adjustable photo resolution, ensuring crisp visuals. Time-lapse intervals can be set from minutes to hours, depending on the user’s preference. This flexibility makes Moultrie cameras adaptable for various surveillance scenarios, whether for hunting, wildlife research, or property security.
4.2 Customizing Settings (Sensitivity, Trigger Speed, Image Quality)
Moultrie Trail Cameras allow users to customize settings to optimize performance. Sensitivity can be adjusted to reduce false triggers caused by wind or small animals. Trigger speed determines how quickly the camera captures images after detecting motion, ensuring fast-moving subjects are recorded clearly. Image quality can be set to high, medium, or low resolution, balancing detail and storage capacity. These settings can be tailored to specific environments, such as dense forests or open fields, enhancing the camera’s effectiveness. Customization options ensure users capture the best possible footage while conserving memory and battery life, making Moultrie cameras highly adaptable for various surveillance needs.
4.3 Night Vision and Infrared Features
Moultrie Trail Cameras are equipped with advanced night vision and infrared capabilities, enabling capturing images in low-light conditions without visible flash. The infrared LED array illuminates the scene, minimizing disturbance to wildlife. These cameras automatically switch to night mode, ensuring clear images even in complete darkness. Adjustments can be made to sensitivity and trigger speed for optimal nighttime performance. The infrared feature ensures discreet operation, making it ideal for monitoring wildlife without alerting them. This technology enhances the camera’s versatility, providing reliable results day and night, and is a key feature for effective wildlife surveillance and security applications.

Wireless and Cellular Features
Moultrie Trail Cameras offer advanced cellular connectivity, enabling real-time monitoring and notifications. Compatible with the Moultrie Mobile network, they provide remote access and data management through subscription plans.
5.1 Connecting to Moultrie Mobile Network
Connecting your Moultrie Trail Camera to the Moultrie Mobile Network is straightforward. First, ensure your camera is compatible with cellular functionality. Activate your SIM card on the Moultrie website and follow the setup guide to link your camera. Power on the device, navigate to the network settings in the menu, and select “Moultrie Mobile” as your provider. Enter the APN settings provided by Moultrie, typically found in the user manual or their support page. Once configured, test connectivity by sending a test image. Ensure a strong signal in your area for optimal performance and remote monitoring capabilities.
5.2 Data Plans and Subscription Options
Moultrie Mobile offers a range of data plans tailored to meet different user needs. Plans vary from low-data options for occasional monitoring to higher-data plans for frequent use. Users can choose between monthly or annual subscriptions, with pricing structured to suit individual preferences. To activate a plan, visit the Moultrie website or use the Moultrie Mobile app. Once subscribed, you can monitor data usage and adjust your plan as needed. Detailed plan information and subscription guidance are provided in the user manual, ensuring a seamless setup process. This flexibility allows users to optimize their cellular trail camera experience based on their specific requirements.
5.3 Remote Monitoring and Notifications
Moultrie trail cameras offer robust remote monitoring capabilities, allowing users to stay connected to their devices from anywhere. Through the Moultrie Mobile app or web portal, users can view images, videos, and activity data in real-time. The system sends notifications via email or app alerts when new content is captured, ensuring users stay informed. Customizable notification settings enable users to filter alerts based on specific events or time frames. This feature enhances monitoring efficiency and provides peace of mind. The manual details how to set up and manage these notifications, ensuring a seamless experience. Remote monitoring is particularly useful for wildlife surveillance or property security, allowing for quick responses to detected activity.

Warranty and Support
Moultrie offers a comprehensive warranty program, ensuring product reliability. Dedicated customer support is available, providing assistance with technical issues and maintenance, enhancing user confidence and satisfaction.

6.1 Understanding the Moultrie Warranty Program
The Moultrie Warranty Program ensures customers receive protection against defects in materials and workmanship. To activate the warranty, users must register their camera on the official Moultrie website. The program covers repairs or replacements for defective products within the warranty period. Regular maintenance, such as updating firmware and using recommended accessories, is essential to uphold warranty validity. Additionally, Moultrie provides clear guidelines on what is covered, including manufacturing defects, and outlines exclusions for improper use or unauthorized modifications. This comprehensive approach ensures customers can rely on their trail cameras for consistent performance and durability in the field.
6.2 Registering Your Camera for Warranty
Registering your Moultrie trail camera is a straightforward process that ensures warranty activation. Visit the official Moultrie website at www.moultriefeeders.com/warranty and fill out the registration form with your personal and product details. Ensure all information is accurate to avoid delays. Once submitted, you will receive a confirmation, which should be saved for future reference. Registration is essential to validate your warranty and access support services. The program covers manufacturing defects, providing peace of mind for your investment. Keep the confirmation alongside your purchase receipt for any potential warranty claims.
6.3 Customer Support and Service Options
Moultrie offers comprehensive customer support to address any queries or issues. Users can contact their team via phone at 800-653-3334, available Monday through Friday from 8:00 AM to 5:00 PM CST. Additionally, detailed manuals and troubleshooting guides are available on their website, providing step-by-step solutions. For further assistance, the Moultrie website hosts extensive resources, including FAQs and diagnostic tools. This ensures that users can resolve issues efficiently without prolonged downtime. Their dedicated support team is committed to delivering prompt and effective solutions, enhancing the overall user experience with Moultrie trail cameras.

Advanced Features
Moultrie trail cameras offer advanced features like built-in memory, cellular connectivity, and diagnostic modes. These innovations enhance functionality, ensuring efficient monitoring and optimal performance in various environments.

7.1 Diagnostic Tests and Troubleshooting
The diagnostic test mode on Moultrie trail cameras ensures proper functionality by checking critical systems. Accessible in Setup mode, it verifies camera operations, helping identify and resolve issues efficiently, ensuring reliability and optimal performance in the field.
7.2 Custom Settings and Configuration
Moultrie trail cameras offer customizable settings to tailor functionality to specific needs. Users can adjust capture modes, sensitivity, trigger speed, and image quality for optimal performance. The Setup mode provides access to these configurations, allowing precise control over camera behavior. Advanced features like time-lapse and multi-shot modes can also be enabled. Custom settings ensure the camera operates efficiently in various environments, capturing high-quality images and videos. Additionally, users can configure power management options, such as battery type and solar panel integration, enhancing durability and reliability in the field. These customization options make Moultrie cameras versatile tools for wildlife monitoring and outdoor surveillance.
7.3 Firmware Updates and Maintenance
Regular firmware updates are essential to ensure your Moultrie trail camera operates at peak performance. Updates often include bug fixes, feature enhancements, and improvements to camera functionality. To update the firmware, connect the camera to a computer using the provided USB cable and follow the instructions in the user manual. Additionally, routine maintenance is crucial for longevity. Clean the camera lens and sensors regularly to prevent dust or debris from affecting image quality. Check the battery terminals for corrosion and ensure all connections are secure. Perform diagnostic tests periodically to identify and address potential issues early. Proper maintenance ensures your camera continues to capture high-quality images and videos reliably over time.
Troubleshooting Common Issues
Identify and resolve common issues like battery drain, connectivity problems, and SD card errors. Refer to the manual for diagnostic tests and repair guidance to restore functionality;
8.1 Resolving Battery Life Problems
Resolve battery life issues by ensuring proper installation and avoiding power drain. Check battery condition, use high-quality alkaline or lithium batteries, and store them correctly. Avoid extreme temperatures and moisture. Enable power-saving features like reduced trigger sensitivity and motion detection intervals. Regularly update firmware and inspect battery contacts for corrosion. Replace batteries every 6-12 months or as needed. For cameras with external power options, consider using solar chargers or power panels to extend life. Refer to the manual for diagnostic tests to identify battery-related issues early. Proper maintenance ensures optimal performance and minimizes downtime in the field. Always follow Moultrie’s guidelines for battery care and replacement.
8.2 Fixing Connectivity and Signal Issues
Resolve connectivity and signal issues by ensuring proper cellular network setup. Verify your data plan is active and camera is registered on Moultrie Mobile. Check signal strength; weak signals may require antenna adjustments. Ensure firmware is updated, as outdated versions can cause connectivity problems. Reset the camera to factory settings if issues persist. Confirm SIM card is correctly installed and not damaged. Test in areas with strong network coverage. Avoid physical obstructions like trees or hills that may block signals. Use diagnostic tools in the camera’s setup mode to identify connection problems. Consult Moultrie’s support for advanced troubleshooting or replace faulty components if necessary. Regular maintenance ensures reliable performance and connectivity.
8.3 Solving SD Card and Storage Problems
Address SD card and storage issues by ensuring compatibility and proper formatting. Use a high-quality SD card up to 32GB, as recommended. Format the card in the camera to prevent errors. If storage is full, transfer files to a computer or delete unnecessary photos/videos. Check the camera’s built-in memory for models like the Edge, which offers internal storage. Avoid using damaged or corrupted cards, and clean the SD card slot if dirty. Perform a diagnostic test in setup mode to identify storage-related issues. Update firmware to resolve compatibility problems. For persistent issues, reset the camera or consult the manual for advanced troubleshooting steps. Proper storage management ensures optimal camera performance.