
nikon d5000 owners manual
Welcome! This guide assists in mastering your Nikon D5000’s features, offering a comprehensive resource based on the official owners manual and recent updates.
Access the manual online for free; it’s rated 8.7/10 by 21 users, providing detailed instructions for this popular photo camera.
What’s in the Box
Upon unboxing your new Nikon D5000, carefully verify all included components against the owners manual’s checklist. Typically, you’ll find the D5000 digital SLR camera body itself, a pre-installed standard zoom lens (often an 18-55mm kit lens), and the EN-EL9a rechargeable Li-ion battery.
Essential accessories include the MH-E4a battery charger, a USB cable for data transfer and remote control capabilities, and a video cable for connecting to a television. The package also contains a strap for comfortable carrying, a body cap to protect the sensor when a lens isn’t attached, and a lens cap for the installed lens.
Furthermore, you should locate the CD-ROM containing Nikon’s ViewNX 2 software, the comprehensive owners manual in multiple languages, and warranty information. Retain all packaging and documentation for potential warranty claims or future reference.
D5000 Key Features Overview
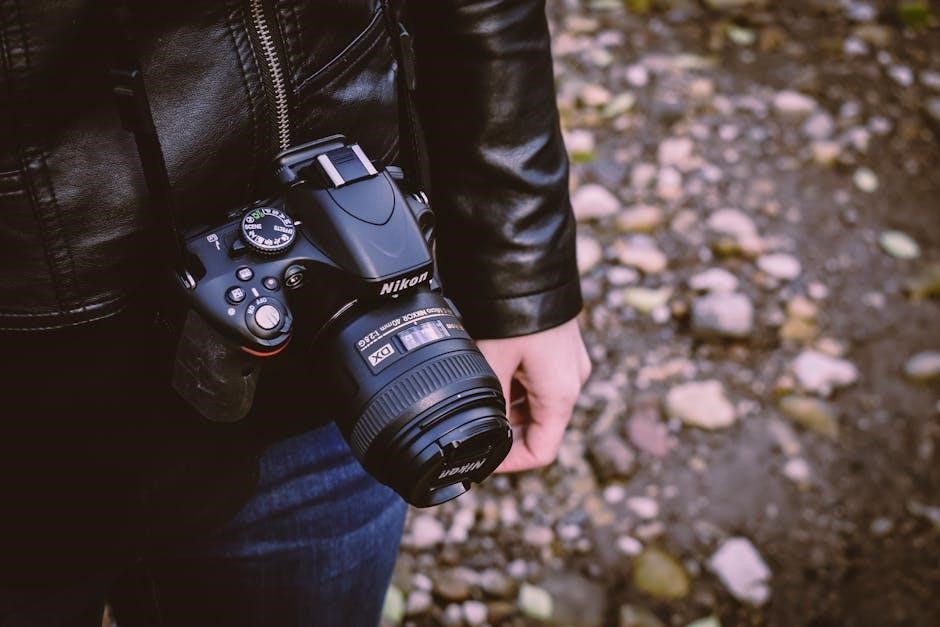
The Nikon D5000, as detailed in the owners manual, boasts a 12.3-megapixel DX-format CMOS sensor, delivering high-resolution images with excellent detail. Its 2.7-inch LCD screen features a wide viewing angle and enhanced brightness for clear image review. A key feature is the 11-point autofocus system, ensuring sharp focus on your subjects.
The D5000 offers HD video recording capabilities (720p), allowing you to capture moving moments. Its built-in image stabilization helps reduce blur caused by camera shake. Scene modes simplify shooting in various conditions, while creative effects add artistic flair.

The camera’s Guide Mode, explained in the owners manual, provides helpful tips and explanations for beginners. It supports SD and SDHC memory cards for ample storage and offers ISO sensitivity up to 3200 for low-light photography.
Getting Started with Your D5000
Begin your journey! Consult the owners manual for detailed instructions on battery and memory card insertion, powering on, and initial camera setup procedures.
Inserting the Battery and Memory Card
Battery Installation: Locate the battery compartment on the bottom of your Nikon D5000. Ensure the camera is turned off. Slide the battery compartment latch to unlock and open the cover. Insert the EN-EL9a battery, aligning the contacts as indicated, and gently push it in until it clicks. Slide the latch closed to secure the battery.

Memory Card Insertion: The memory card slot is also located on the bottom of the camera, typically near the battery compartment. Open the card slot cover. Insert a compatible SD card (SDHC or SDXC) label-side up, pushing it in until it clicks. Do not force the card. Close the card slot cover securely. The owners manual provides diagrams for visual guidance. Always power off the camera before inserting or removing either the battery or memory card to prevent data corruption.
Powering On and Initial Setup
Powering On: Locate the power switch on the top-right of your Nikon D5000. Slide it to the “ON” position. The camera will initialize, and the LCD screen will illuminate. If the battery is low, a warning may appear – ensure a fully charged battery is used for optimal performance.
Initial Setup: Upon first power-on, the camera will guide you through an initial setup process. This includes selecting your language, date, and time. Use the multi-selector and OK button to navigate and confirm your choices. The owners manual details each step. Pay close attention to the date/time settings, as these are embedded in your image files. Ensure these are accurate for proper organization and archiving of your photos.
Understanding the Mode Dial
The Mode Dial, located on the top-right of the D5000, is central to controlling shooting settings. The owners manual thoroughly explains each mode. “Auto” mode simplifies operation for beginners, letting the camera handle all settings. “Scene” modes offer pre-defined settings for specific situations like portraits or landscapes.
“P” (Program Auto) allows some control over ISO and white balance while maintaining automatic aperture and shutter speed. “S” (Shutter Priority) lets you set the shutter speed, ideal for action shots. “A” (Aperture Priority) controls depth of field. “M” (Manual) grants full control over both. Explore these modes to unlock your creative potential!
Basic Camera Operations
Mastering the basics is key! The owners manual details focusing, exposure, and auto mode usage for effortless image capture with your Nikon D5000.
Focusing Modes: Auto and Manual
The Nikon D5000 offers versatile focusing options, detailed within the owners manual. Auto-focus utilizes various modes – Single Servo (AF-S) for stationary subjects, Continuous Servo (AF-C) for moving subjects, and Auto-focus Area Modes like Auto-area, Center-weighted, and Dynamic-area.
Understanding these modes is crucial for sharp images. The manual explains how to select the appropriate focus point(s) based on your scene. For precise control, switch to Manual Focus (MF). This allows you to fine-tune focus using the focusing ring on your lens.
Practice is key! Experiment with both auto and manual focusing to determine which best suits your photographic style and subject matter. The owners manual provides clear illustrations and step-by-step instructions for each mode.
Exposure Control: Aperture, Shutter Speed, and ISO
Mastering exposure is fundamental, and the Nikon D5000 owners manual provides a thorough explanation. Exposure is controlled by three key elements: Aperture (f-stop), Shutter Speed, and ISO sensitivity.
Aperture controls the lens opening, affecting depth of field. Shutter speed determines how long the sensor is exposed to light, influencing motion blur. ISO adjusts the sensor’s sensitivity to light; higher ISOs are useful in low light but can introduce noise.
The manual details how to adjust these settings in various shooting modes – Auto, Program, Aperture-priority, Shutter-priority, and Manual. Understanding the interplay between these three settings is crucial for achieving properly exposed and creatively compelling photographs.
Shooting in Auto Mode
For beginners, the Nikon D5000 owners manual emphasizes the simplicity of Auto mode. In this mode, the camera automatically selects the optimal aperture, shutter speed, and ISO for the scene. It’s ideal for quick snapshots and situations where precise control isn’t necessary.
However, the manual also advises understanding Auto mode’s limitations; While convenient, it doesn’t allow for creative control over depth of field or motion blur. To utilize Auto mode effectively, focus on composition and framing.
The manual details how to activate Auto mode using the Mode dial and suggests reviewing the resulting images to learn how the camera makes its decisions, building a foundation for more advanced techniques.
Understanding the Menu System
The Nikon D5000 owners manual details a comprehensive menu system for customizing settings. Navigate via buttons, adjusting shooting, setup, and image quality options easily.
Navigating the Setup Menu
The Nikon D5000’s setup menu, detailed in the owners manual, is your central hub for camera personalization. Accessed through the menu button and directional pad, it’s logically organized into several tabs.
You’ll find options for display settings – brightness, LCD color balance, and viewfinder display information. Date/time adjustments, language selection, and file naming methods are also here. Crucially, the setup menu controls essential functions like sensor cleaning (timer settings) and format memory card options.
Pay close attention to the ‘General Setup’ tab, which houses critical settings like auto lock mirror-up for dust reduction and USB connection mode. Understanding each option within the setup menu, as explained in the manual, is key to optimizing your D5000’s performance and tailoring it to your shooting style.
Customizing Shooting Settings
The Nikon D5000’s shooting settings menu, thoroughly covered in the owners manual, allows extensive camera personalization. Within this menu, you can fine-tune autofocus (AF) settings, selecting AF-S, AF-C, or auto-focus modes, and choosing focus points for precise targeting.
Image quality settings are crucial; select from RAW, JPEG (various sizes and compression levels), or both. Adjust ISO sensitivity for low-light performance, and explore metering modes (matrix, center-weighted, spot) to control exposure.
White balance presets and custom settings ensure accurate color rendition. The manual details how to customize picture control profiles (Standard, Vivid, Neutral, etc.) to achieve your desired aesthetic. Mastering these settings unlocks the D5000’s full creative potential.
Image Quality and Size Settings
The Nikon D5000’s owners manual dedicates significant detail to image quality and size options. You can choose between RAW (uncompressed, maximum detail), JPEG (compressed, smaller file size), or both simultaneously for versatile post-processing.
JPEG settings offer various size options – Large, Medium, Small – impacting image resolution and file size. Compression levels (Fine, Normal, Basic) further refine file size versus image quality.
Selecting the appropriate settings depends on your intended use; RAW is ideal for professional editing, while JPEGs are convenient for quick sharing. Understanding these options, as explained in the manual, is vital for optimizing storage and achieving desired image results.

Advanced Photography Techniques
Explore creative control! The owners manual details scene modes, flash options, and white balance adjustments for stunning photos beyond automatic settings.
Using Different Scene Modes
Unlock your D5000’s potential with its versatile scene modes! The owners manual comprehensively explains each preset, designed for specific shooting situations. Explore options like ‘Portrait’ for beautiful bokeh, ‘Landscape’ for sharp details, ‘Sports’ to freeze action, and ‘Night Portrait’ for balanced low-light shots.
These modes automatically optimize camera settings – aperture, shutter speed, ISO, and white balance – simplifying complex adjustments. The manual guides you through understanding when to use each mode for optimal results. Don’t overlook ‘Close-up’ for macro photography, capturing intricate details. Experimenting with scene modes is a fantastic way to learn photographic principles and achieve professional-looking images without manual control.
Remember to consult the manual for specific settings within each mode, allowing for further customization to suit your creative vision.
Working with Flash Photography
Master built-in flash functionality with guidance from your D5000’s owners manual. Learn to effectively utilize the pop-up flash for various scenarios, from filling shadows in bright daylight to illuminating subjects in low-light conditions. The manual details flash modes: Auto, Auto with Red-Eye Reduction, Fill-Flash, and Manual.
Understand how to adjust flash compensation to fine-tune brightness and avoid overexposure. Explore the benefits of using external flashes for greater power and creative control – the manual may offer compatibility information. Discover techniques for bouncing flash off ceilings or walls for softer, more natural lighting.
The manual also explains how flash synchronization impacts shutter speed, ensuring sharp, well-exposed images. Practice these techniques to elevate your photography!
Understanding White Balance
Achieve accurate colors with the Nikon D5000’s white balance settings, detailed in your owners manual. Learn how white balance corrects color casts caused by different light sources – sunlight, shade, tungsten, fluorescent, and flash. The manual explains preset options for common lighting conditions, ensuring natural-looking images.
Explore custom white balance, allowing you to manually set the color temperature for precise control. Understand the impact of incorrect white balance on image aesthetics and how to adjust settings for creative effects. The manual likely provides guidance on using the white balance bracketing feature.
Practice adjusting white balance to master color accuracy and unlock your D5000’s full potential!

Troubleshooting Common Issues
Refer to your owners manual for solutions to problems like a camera that won’t power on or error messages. Lens compatibility details are also included.
Camera Not Turning On

If your Nikon D5000 fails to power on, first, ensure the battery is fully charged and correctly inserted. Consult your owners manual for proper battery installation instructions. A recently reported issue involved a refurbished Z9 arriving with a dead battery – check the charger’s indicator light for confirmation.
Next, verify the battery contacts within the camera and on the battery itself are clean and free of any obstruction. Try a different, known-working battery if available. If the issue persists, review the manual’s troubleshooting section for potential fuse problems or internal component failures. Remember to always refer to the official documentation for safe and accurate guidance.
Finally, ensure the power switch is fully engaged and not stuck in an intermediate position.
Error Messages and Solutions
Encountering error messages on your Nikon D5000? Your owners manual is the primary resource for decoding these. While specific codes vary, common issues relate to the memory card, lens compatibility, or internal camera functions. Always note the exact error code displayed for accurate troubleshooting.
If a memory card error occurs, try reformatting the card (after backing up its contents!). Lens errors might indicate incompatibility or a connection problem – ensure the lens is securely attached. Refer to the manual for a list of compatible lenses. For internal errors, attempting a camera reset (as detailed in the manual) can sometimes resolve the issue.
If problems persist, contact Nikon support, providing the error code for assistance.
Lens Compatibility and Issues
Ensuring lens compatibility is crucial for optimal Nikon D5000 performance. Your owners manual lists compatible Nikkor lenses, but generally, any Nikon F-mount lens will work. However, older lenses may lack autofocus or advanced features. Recent discussions highlight potential issues with certain wide-angle zooms in the Z mount, requiring adapters for use.
If experiencing lens issues, verify a secure connection. A malfunctioning 500mm f/4 P IF-ED lens reported a similar problem, suggesting potential internal issues. Check for damaged contacts on both the lens and camera body. The manual details proper lens attachment and cleaning procedures.
Always prioritize genuine Nikon lenses for guaranteed compatibility and performance.

Maintaining Your Nikon D5000
Regular maintenance ensures longevity! The owners manual details sensor cleaning, battery care, and accessing firmware updates via NX Studio (Nikon ID required) for peak performance.
Cleaning the Sensor
Maintaining a clean sensor is crucial for optimal image quality with your Nikon D5000. Dust accumulation can lead to noticeable spots in your photographs, especially at smaller apertures. The owners manual provides guidance, but generally, it’s recommended to use a blower to gently remove loose particles first.
Avoid touching the sensor directly! If blowing doesn’t suffice, consider a sensor cleaning kit specifically designed for DSLRs. These kits typically include swabs and cleaning fluid. Follow the instructions meticulously to prevent damage. Nikon also offers professional sensor cleaning services if you’re uncomfortable performing this task yourself. Regular cleaning, as outlined in the manual, will help preserve the clarity and sharpness of your images.
Remember to always power off the camera and remove the lens before attempting any sensor cleaning procedures.
Battery Care and Storage
Proper battery care significantly extends the life of your Nikon D5000’s power source. The owners manual recommends fully charging the battery before its first use. Avoid frequent, complete discharges, as this can reduce its capacity over time. Instead, charge it when it’s partially depleted.
For long-term storage, discharge the battery to approximately 50% and store it in a cool, dry place. Avoid extreme temperatures, as heat can damage the battery. Do not leave a fully charged or fully discharged battery unattended for extended periods. Always use the supplied charger (MH-31 or MH-33) to ensure correct charging voltage and prevent damage. Refer to the manual for specific warnings and safety precautions regarding battery handling.
A recently refurbished Z9 arrived with a dead battery, highlighting the importance of checking battery health.
Firmware Updates and NX Studio Access (Nikon ID Required)
Keeping your D5000’s firmware updated is crucial for optimal performance and compatibility. Check Nikon’s official website regularly for available updates, and follow the instructions in the owners manual carefully during the installation process. Firmware updates often address bugs and add new features.
Accessing NX Studio version 1.9.0 and later now requires a Nikon ID. This change, implemented in May 2025, means you’ll need to register and log in to utilize the software’s full capabilities. Ensure your Nikon ID is active and linked to your account. This system streamlines access and potentially unlocks additional services. Refer to Nikon’s support pages for detailed guidance on Nikon ID setup and NX Studio integration.
Remember, a Nikon ID is now essential for software access.